
Guide · Updated
Bitaxe Gamma overclocking: settings your cooler can hold
How to overclock a Bitaxe Gamma 601 or 602 one step at a time, what each setting does, and how much cooling each step needs. Settings and limits come from the ESP-Miner firmware (v2.15.4); measurements are credited, and we say when the source sells parts. We don’t publish a frequency and voltage of our own to copy: every chip is different. Links are under Sources.
Read this first. The OSMU wiki, the Bitaxe community’s own docs, warns: “Overclocking can permanently damage your device.” Higher settings mean more power and more heat, and the risk is yours.
The short answer
- Stock: 525 MHz at 1150 mV. The Settings dropdowns go up to 690 MHz and 1250 mV.
- Beyond the dropdowns: add
?octo the AxeOS address to type in your own values. - Frequency makes the hashrate; voltage only keeps the chip stable, and it’s what makes most of the extra heat.
- Go one step at a time: raise frequency, let it settle, check hashrate and both temperatures, and add voltage only when it’s needed.
- The voltage regulator (VR) usually limits you first, not the chip. Watch it yourself; auto fan ignores it.
- Upgrade cooling and paste first. That’s the OSMU wiki’s advice too.
Stock settings and the dropdowns
In AxeOS, frequency and core voltage are under Settings. Without the unlock, you choose from these lists (the same for the 601 and 602):
| Setting | Default | Dropdown choices |
|---|---|---|
| Frequency | 525 MHz | 400, 490, 525, 550, 600, 625, 690 MHz |
| Core voltage | 1150 mV | 1000, 1060, 1100, 1150, 1200, 1250 mV |
The Gamma’s own readme warns that it “uses more power” than earlier Bitaxes, and to pay attention to frequency and voltage “as it’s much easier to overheat, especially when using the stock heatsink and fan.”
What frequency and voltage actually do
Frequency sets the hashrate. AxeOS works out the hashrate it expects from frequency alone: the frequency in MHz times 2,040 cores, which comes to about 2.04 GH/s per MHz on a Gamma. At 525 MHz that’s about 1.07 TH/s; at 600 MHz, about 1.22 TH/s. That’s the “Expected” figure on the dashboard.
Voltage adds no hashrate. It lets the chip run a higher frequency without errors, and it costs a lot of power. Solo Satoshi’s bench of a Gamma 602 shows both effects:
| Frequency / voltage | Hashrate | Power | Efficiency | ASIC | VR |
|---|---|---|---|---|---|
| 525 MHz / 1150 mV (stock) | 1.07 TH/s | 17.8 W | 16.6 J/TH | 49.3°C | 57°C |
| 600 MHz / 1150 mV | 1.22 TH/s | 20.1 W | 16.5 J/TH | 51.4°C | 62°C |
| 625 MHz / 1250 mV | 1.27 TH/s | 25.2 W | 19.8 J/TH | 56.1°C | 71°C |
| 750 MHz / 1250 mV | 1.54 TH/s | 30.2 W | 19.6 J/TH | 60.3°C | 86°C |
| 800 MHz / 1250 mV | 1.63 TH/s | 32.2 W | 19.8 J/TH | 62.4°C | 94°C |
Two things stand out. Going from 525 to 600 MHz at stock voltage added 14% hashrate with no loss of efficiency. The +100 mV step to 625 MHz added 25% more power for about 4% more hashrate. And as the frequency climbed, the VR heated far faster than the chip: 94°C against 62.4°C at 800 MHz. Solo Satoshi calls the VR “the real bottleneck, not the ASIC itself.” Their board ran Solo Satoshi’s own pin-fin heatsink and Kryonaut Extreme paste, so other boards and coolers will differ.
Going past the dropdowns: ?oc
To type in your own frequency and voltage, open AxeOS with ?oc on the end of the address, for example http://192.168.1.50/?oc with your miner’s IP. The frequency and voltage dropdowns become number boxes, and AxeOS shows this warning:
“Custom settings can cause damage & system instability. Only modify these settings if you understand the risks of running outside designed parameters.”
- It stays unlocked. AxeOS saves the setting, so the boxes are still there after a reboot.
- There’s no upper limit. The boxes accept any number, so a typo like 7000 instead of 700 goes straight to the chip. Double-check before you save.
Before you start
- Upgrade the cooling first. The OSMU wiki: “upgrade your heatsink and thermal paste before attempting overclocking.” Our cooling guide covers paste, VR cooling and bigger heatsinks, and the fan guide covers fans.
- Check the power supply. OSMU’s safe input range is 4.8–5.3V, and “voltage dropping below 4.8v indicates insufficient power. A higher-rated power supply may be necessary.” Watch the input voltage on the dashboard as the power climbs.
- Know the limits. OSMU recommends keeping the ASIC below 70°C and the VR below 90°C. The firmware stops mining at 75°C (ASIC) or 105°C (VR). Leave a margin for warm days.
- Write down your stock numbers: hashrate, power, ASIC and VR temperature, input voltage. You’ll compare every step against them.
Step by step
- Raise frequency one step and leave the voltage alone. Small steps make it obvious which change caused a problem; the mrv777 benchmark tool, for example, steps 25 MHz at a time.
- Let it settle. bitaxe.de, a seller, suggests judging by the one-hour average hashrate, which should reach at least 95% of “Expected”.
- Check four things: hashrate against Expected, ASIC temperature, VR temperature, and input voltage.
- If the hashrate falls short of Expected, the chip may need more voltage. Add one small voltage step (the mrv777 tool uses 20 mV) and test again. If it still falls short, go back to the last good frequency.
- Stop when a temperature nears its limit or the input voltage sags toward 4.8V, then back off a step for margin.
- Try less voltage at the end. Some chips hold the same frequency on less voltage, which runs cooler. Solo Satoshi suggests lowering voltage in 25 mV steps from stock.
Signs you’ve gone too far
- Hashrate well below Expected, even after adding voltage.
- Reboots or dropouts at high frequency. Solo Satoshi’s fix for reboots is to “direct airflow across PCB backside,” where the VR sits.
- Input voltage under 4.8V: the power supply can’t keep up.
- Overheat mode: the miner logs “OVERHEAT!”, stops mining and runs the fan at 100%.
The overheat trap at low voltage
When the firmware trips overheat mode, it restarts the miner 100 MHz and 100 mV lower than before. In v2.15.4 that has no floor: a board set to 1060 mV comes back at 960 mV. bitaxe.de notes that below 1000 mV the voltage regulator doesn’t work and AxeOS reports a power fault. If that happens, set the frequency and voltage back by hand. AxeOS also asks you to “reset Frequency and Voltage” before you press “Disable Overheat Mode”. Our temperature guide covers overheat mode in full.
There’s no single “best” setting
Search for “bitaxe best settings” and you’ll find many different answers, because chips vary and so do coolers, rooms and power supplies. What the numbers above do show:
- For the most hashrate per watt, add frequency at stock voltage and stop where the chip needs more voltage. In Solo Satoshi’s test, 600 MHz at 1150 mV was as efficient as stock.
- For the most hashrate, expect to add voltage and pay for it in power: about 20 J/TH from 625 MHz up in that same test.
- For a cool, quiet miner, go the other way. bitaxe.de suggests 490 MHz at 1100 mV for “just under 7%” less hashrate and about 15% less power.
Can it tune itself?
Not on its own: AxeOS has no auto-tune. The most-used community tool is mrv777’s Bitaxe Hashrate Benchmark, a free Python script that runs on a computer on the same network. It steps through frequency and voltage combinations and records hashrate, temperatures and efficiency. By default it stops at 66°C on the chip, 86°C on the VR, and 1400 mV. Those are the tool’s limits, not the firmware’s. We haven’t tested it ourselves, so read its README before running it.
The cooling each step needs
As the table shows, the chip warms slowly and the VR warms fast. In order of what limits you:
- VR cooling raises the ceiling. PlebBase (affiliate links) tested a Gamma with and without a small clamp-on VR heatsink: the highest stable clock rose from 702 MHz to about 752–783 MHz. More in the cooling guide’s VR section.
- The chip needs a better heatsink and paste as power climbs. Bigger Raspberry Pi coolers mount on the Gamma with an adapter; ours are below.
- A quieter fan moves less air. If you overclock, keep the airflow up or move to a bigger cooler with a bigger fan. See the fan guide.
For scale: PlebBase’s heavily modified reference Gamma ran 1000 MHz at 1290 mV for 2.04 TH/s and 37.3 W. That board had a GeeekPi Low-Profile Plus with a Noctua fan, but also indium thermal material, soldered heavy power wiring and extensive copper VR cooling, so it isn’t what a cooler upgrade alone will do. We’re testing our coolers side by side against stock and will publish every number.
Cooler adapters for Bitaxe Gamma 601/602
7 parts
-
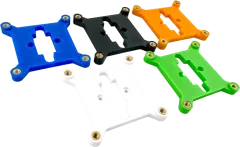 Best sellerBitaxe 52Pi ICE Tower Heatsink Adapter$9.99
-
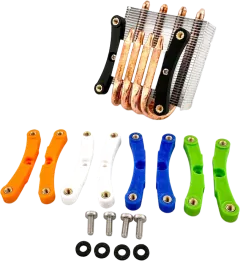 $9.49
-
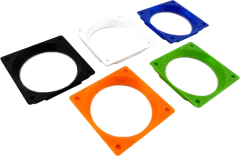 $9.99
-
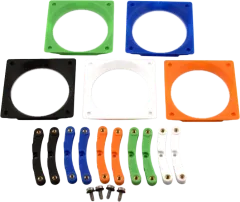 $15.99
-
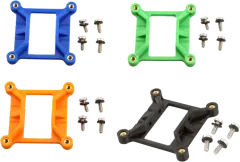 $9.99
-
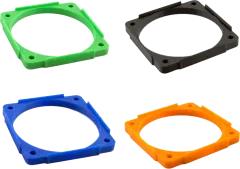 $9.99
-
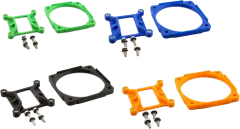 $15.99
Mistakes to avoid
- Overclocking on the stock heatsink, fan and paste.
- Watching only the ASIC temperature. The VR usually gives out first, and auto fan doesn’t follow it.
- Adding voltage before trying the frequency at stock voltage.
- Big jumps, or changing frequency and voltage together, so you can’t tell what caused a problem.
- A typo in the
?ocnumber boxes, which have no upper limit. - An undersized power supply that lets the input voltage sag below 4.8V.
- Leaving no margin for a warm day.
Running a NerdQaxe+ or ++? The firmware is related but the board isn’t; see the NerdQaxe cooling guide.
Sources
- Official: ESP-Miner firmware v2.15.4, Bitaxe Gamma readme, OSMU wiki FAQ.
- Independent tests: PlebBase (affiliate links).
- Sellers’ guides: Solo Satoshi overclocking guide, bitaxe.de quiet guide.
- Tool: mrv777 Bitaxe Hashrate Benchmark (README).
Questions?
Send us your settings and temperatures, and we’ll reply, usually within one business day.